Connecting Ultrasound Machines to DVD-Recorders and Flatscreens
Multiple problems can arise when you try to connect a DVD-Recorder and Monitor to your ultrasound machine. With a little understanding of video, DVD-Recorders, and the process, this can become a less daunting procedure.
Understanding Video Connections on your Ultrasound Machine
In the last week alone, I’ve had four requests for help in getting a Voluson i portable ultrasound connected to a DVD-Recorder and external monitor.
There really isn’t a simple answer to this… because the same thing doesn’t always work for everyone. In general, however, the overall process and requirements are the same whether you’re using a Voluson i or other 4D ultrasound machine.
The problems for everyone lie in how to connect three or more devices to an ultrasound that has only one video output. With a little understanding, it becomes less daunting. Here I’ll outline what most people are using, why, and how you can create this setup.
A Common DVD-Recorder and External Monitor Setup
The most common setup has three devices: an ultrasound, a DVD-Recorder, and a monitor.
It’s important to understand that it’s best to set these up in a chain: From Ultrasound machine to DVD-Recorder, then DVD-Recorder to external tv/flatscreen/monitor: i.e. you should not connect both the monitor and the DVD Recorder directly to the machine at the same time. Why? Because a DVD-Recorder requires you to “Finalize” a DVD in order to play the DVD on a standard DVD player. And in order to Finalize the DVD, you must follow-on screen menus that can only be viewed on an external monitor.
Connecting these three items was an easy task at one time. But it’s not anymore.
You see, most DVD Recorders today do not have the same type of Video Input as the ultrasound’s Video Output. So, you must add a fourth device to your setup. This device is called a Video Converter. This is addressed below.
Connecting Monitors and DVD-Recorders to an Ultrasound Machine
Your ultrasound likely comes with one or more of these 4 Video output options:
- S-Video
- VGA
- DVI
- HDMI
S-Video used to be the most common and easy setup. But it’s extremely difficult to find a DVD-Recorder with an S-Video input any longer.
Additionally… most portable 4D ultrasound machines do not have an S-Video connection, and you’re faced with the more common VGA video output. Few have HDMI, but it will be common soon enough.
Below I outline different setups with these 4 video outputs. In order perform the following steps, you’ll need to know the video output on your machine, and the video inputs available on your DVD-Recorder.
Connecting to an Ultrasound with S-Video output
At one time, S-Video was the easy and most common configuration. However, nowadays its nearly impossible to find a DVD-Recorder or Flat-Panel monitor with an S-Video input.
If you happen to have S-Video out on your ultrasound, and S-Video In on your DVD recorder, it’s a fairly straightforward process… connect an S-Video cable from the ultrasound’s S-VHS/S-Video output to the S-Video Input on the DVD Recorder, then connect the S-Video Out on the DVD-Recorder to the S-Video In on your monitor.
Connecting to an Ultrasound with VGA output
This has become one of the most common configurations, and also the most problematic. The reason is, there isn’t a DVD-Recorder out there with a VGA input.
Enter the Video Converter.
There are a number of converters out there, and the one you choose depends on the DVD-Recorder’s video input types. I will not recommend a particular type or brand because availability changes often, and I cannot guarantee any single converter will work with your setup.
Your best bet is to go to an electronics store or try shopping online for a “VGA to X” converter, where X is the type of video input your DVD-Recorder requires (such as Component or HDMI).
While I won’t recommend a specific type of converter, do not, I repeat: DO NOT, buy a converter cable. You must purchase a powered converter box. For a Voluson i, I used a product from a company named ‘i-you’ that I found on Amazon. It’s a VGA-to-HDMI converter box and it was successful. I cannot promise it will work for you. The same converter will be found under different brand names, but the picture on the left will show you the product.
I highly recommend getting a powered converter. I also highly recommend choosing Component, HDMI, or DVI as your output choice because of the improved video quality.
To use this with your ultrasound machine: connect a VGA cable from the ultrasound to your converter. From the converter, connect to the DVD-Recorder with whatever output you have available (HDMI, Component, etc.). From there, connect the DVD-Recorder to the TV/FlatPanel with preferably the same type of cable you used from the converter to the DVD-Recorder (HDMI, Component, etc).
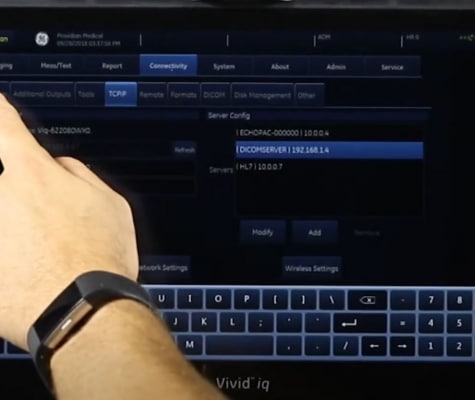
Note to Voluson i users. When you follow this configuration, it will not initially work for you. You must press Utilities on the Voluson i keyboard, then choose “Activate VGA Port”.
Connecting to an Ultrasound with DVI or HDMI Output
This is a fairly straightforward connection, and a converter may not be necessary. All you need to do is make sure the input on your DVD recorder has HDMI or DVI. If you have DVI output and your DVD-Recorder only has HDMI, you can purchase a DVI to HDMI cable (powered converter box should not be necessary in this situation). Then connect the ultrasound machine to the DVD-Recorder, then the DVD-Recorder to the monitor.
How to Avoid Ultrasound Video Degradation
Be careful of a setup that could degrade the video quality from your ultrasound machine. There are a few setups that will likely degrade the video from the ultrasound machine.
First, avoid long cables on VGA and S-Video, connections longer than 15 feet can begin to degrade image quality. If you must do this, try to place the video converter somewhere halfway along the chain. A powered converter should boost the signal and limit the video degradation.
Second, don’t go backwards with cable quality. You’ll want to use the best quality possible out of the ultrasound machine. So, if your ultrasound uses DVI or HDMI, try not to use a lower quality video cable such as VGA or S-Video from your DVD-Recorder to the monitor.
Following is a list of the video quality from low-to-high. Whatever your video output is on your machine, you don’t want to go backwards (e.g. HDMI to S-Video). It’s fine going up, however, such as from an ultrasound machine’s S-Video output to a VGA, HDMI, or DVI connection. Some DVD-Recorders will try and upgrade that video signal, as well.
- Composite: This is the old-school yellow connector. This was good in 1985. Avoid at all costs.
- S-Video: Previously this was the most common setup because Voluson 730 systems had S-Video out, and you could find DVD-Recorders with S-Video input. Video quality is acceptable, but I recommend VGA or HMDI/DVI if possible. The problem with S-Video is that the images will appear blurry on larger screens (24″ or greater). Few machines have S-Video output as it has been largely phased out for medical use. Typically it is only used for connecting to a black and white thermal printer, where the quality is acceptable.
- VGA: This is becoming the most commonly found connection and provides a good 4D image on the external monitor. It’s OK to go down to S-Video from here, but avoid S-Video if you can.
- HDMI or DVI: This is becoming more common on ultrasound machines and is highly recommended. It’s easier to connect, and the resolution is at least twice as good as S-Video.
Final Notes on Ultrasound Video Connections
This doesn’t always work on your first shot. Some ultrasound machines output strange resolutions that confuse a video converter, DVD-Recorder, or monitor. You may need to make adjustments to the resolution on your monitor or converter in order to accept whatever resolution your ultrasound produces.
This is one part of a multipart series on 4D ultrasound machines setup and usage. Here are links to the remaining articles:
Connecting 4D Ultrasounds to Flatscreens and Other Devices
4D Ultrasound Basic Training for Obstetric “Babyface” Imaging
Common 4D Imaging Problems and Mistakes